

How To Upload Photos From Internal Memory On Phone
"I have accidentally deleted some files from my Samsung S6's internal memory. I found some tools to recover data from an SD card, just tin I apply them to perform an internal storage recovery? I don't want the existing information on my phone to be deleted in the process."
This is a query that an Android user sent us a few days back almost data recovery from phone memory. These days, it is quite mutual to accept an internal storage of 64, 128, and fifty-fifty 256 GB on Android phones. Due to this, the utilize of SD cards has been drastically decreased. While it might seem convenient at first, information technology comes with its own grab. For instance, information technology tin exist tough to recover photos from phone retentivity instead of an SD card. Meet how to recover data from Android SD card here.
All the same, by using the right memory recovery software, you can certainly remember the lost and deleted content from the internal memory of your phone. In this guide, I volition teach you how to recover deleted files from Android telephone's internal memory in iii dissimilar ways.
- Function one: Is information technology possible to recover deleted files from Android internal storage?
- Part 2: How to recover deleted files from Android phone retention? (The easy way)
- Role three: How to recover deleted files from internal memory for gratis? (Complicated)
- Part 4: How do I recover data from the internal memory of a non-working Android telephone?
Part ane: Is information technology possible to recover deleted files from Android internal storage?
While an internal memory recovery sounds tougher than an SD card recovery, it can be performed by using the right retention recovery software. This is because when data is removed from the phone's storage, it isn't deleted permanently.
There is a pointer index tabular array that stores the memory location where the data is stored in your device. Too often, it is only the pointer index that is either relocated or wiped off. Therefore, the processor tin can't locate your data and it becomes inaccessible. It doesn't mean that the actual data has been lost. It just ways that now information technology is ready to be overwritten by something else. If you wish to get your data back from a telephone'southward internal memory then brand sure y'all follow these suggestions:
- Don't restart your device as well many times in hope to get your data back. If information technology hasn't appeared after restarting your phone one time, then you need to utilise a telephone retentiveness recovery tool.
- Avoid using your phone as soon equally your data has been lost. If you will keep using it, then the new data might overwrite the inaccessible content. Don't use any app, browse the web, or even connect to the internet.
- Endeavour to human action as fast equally possible to get better results for internal retention recovery. The longer you wait, the harder it becomes to recover your information.
- Only use a reliable tool to perform data recovery from phone retention.
- In social club to avoid whatever unwanted data loss, fill-in your Android phone regularly or sync it with a deject service.

Office two: How to recover deleted files from Android telephone retentivity? (The easy way)
One of the easiest ways to perform internal storage recovery from your Android device is by using Dr.Fone – Data Recovery (Android). Information technology is a role of the PhysicianFone toolkit and is known to yield the highest success charge per unit in the industry. The software is developed by Wondershare and is ane of the first data recovery tools for smartphones.
The all-time thing about PhysicianFone – Data Recovery (Android) is that it features an extremely user-friendly interface. Therefore, even if you have no prior technical feel, you would exist able to recover deleted files from Android's internal storage. The existing information on your phone won't exist deleted in the attempt of recovering the lost content as well. Here are some other features of this astonishing retentiveness recovery software.
![]()
Dr.Fone - Data Recovery (Android)
World's 1st Android smartphone and tablet recovery software.
- Recover Android information by scanning your Android telephone & tablet direct.
- Preview and selectively recover what you desire from your Android phone & tablet.
- Supports diverse file types, including WhatsApp,Messages & Contacts & Photos & Videos & Sound & Document.
- Supports 6000+ Android Device Models & Various Android Bone, icluding Samsung S7.
- The tool at present can recover deleted files from Android phone retentiveness only if information technology is rooted or earlier than Android eight.0.
3981454 people accept downloaded it


With so many advanced features, Dr.Fone – Data Recovery (Android) is a must-accept retentivity recovery software for all of us. Yous tin follow the steps below to recover deleted files from phone memory.
- Before you proceed, go to your telephone's Settings > Most Phone and tap on the "Build Number" 7 consecutive times to unlock the Programmer Options. Subsequently, you can turn on the USB Debugging option past visiting Settings > Developer Options.
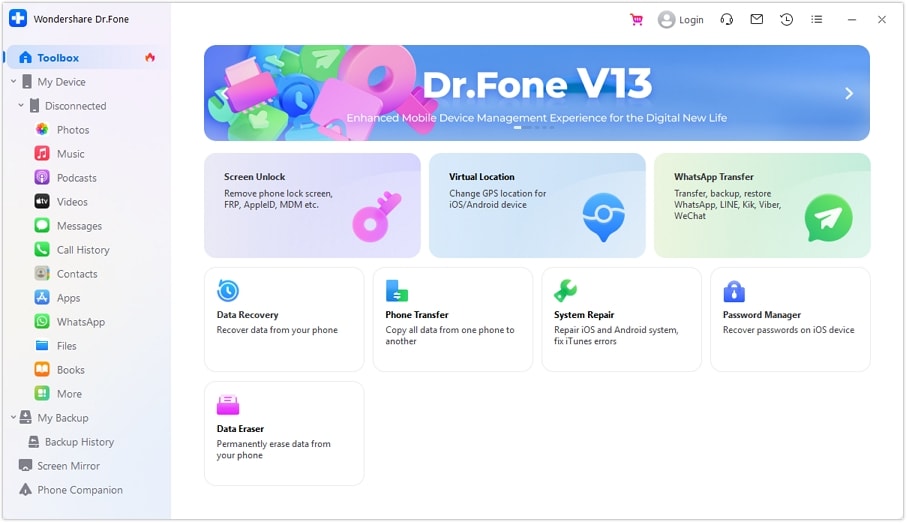
- Now, launch DocFone toolkit on your Mac or Windows system and connect your phone to information technology. To beginning the phone retentiveness recovery, select the "Data Recovery" module from its welcome screen.
- The application volition automatically find your phone. You can choose to perform data recovery from your Android device's internal retentivity.
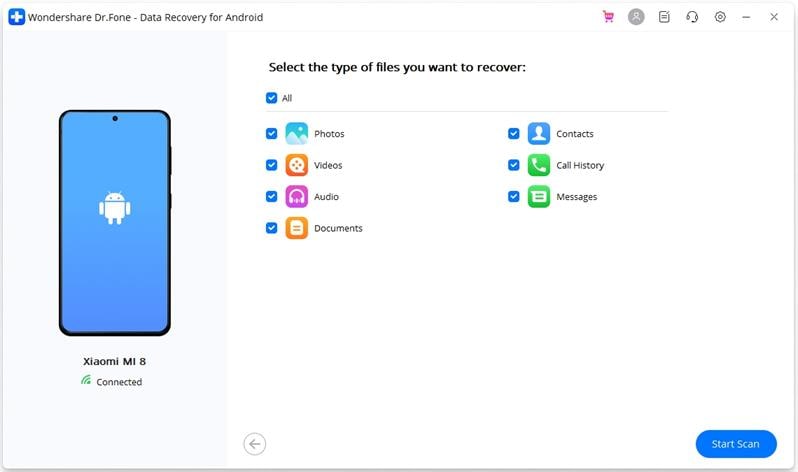
- From the next window, select the type of data that you wish to recover. Y'all can brand multiple selections or choose to look for all kinds of data besides. Click on the "Next" push to proceed.
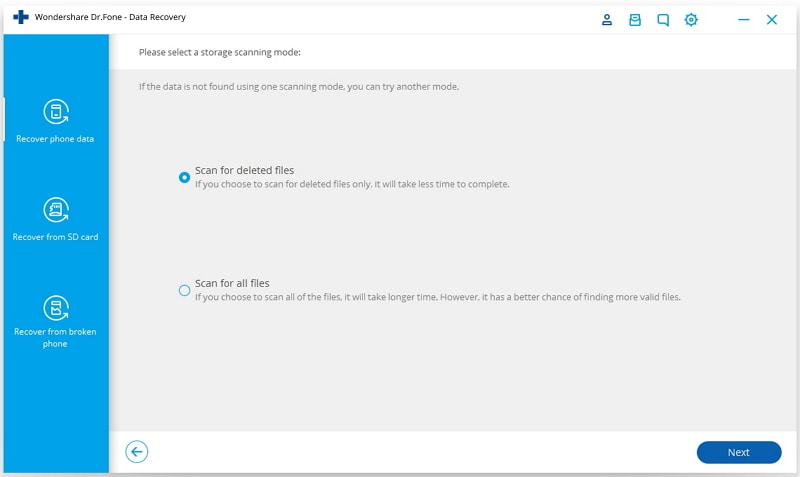
- Furthermore, you have to select whether yous wish to scan for all data or await for only deleted content. To get better results, we recommend scanning for all data. It might accept more time, but the results would also be more extensive.
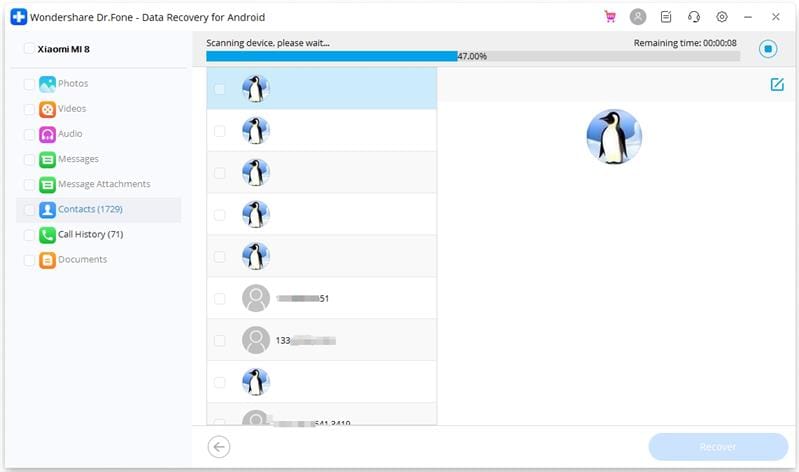
- Sit down back and wait for a few minutes as the application would analyze your device and look for any deleted or inaccessible data.
- Don't disconnect your phone during the internal storage recovery and be patient. You can come across the progress of the recovery process from an on-screen indicator.
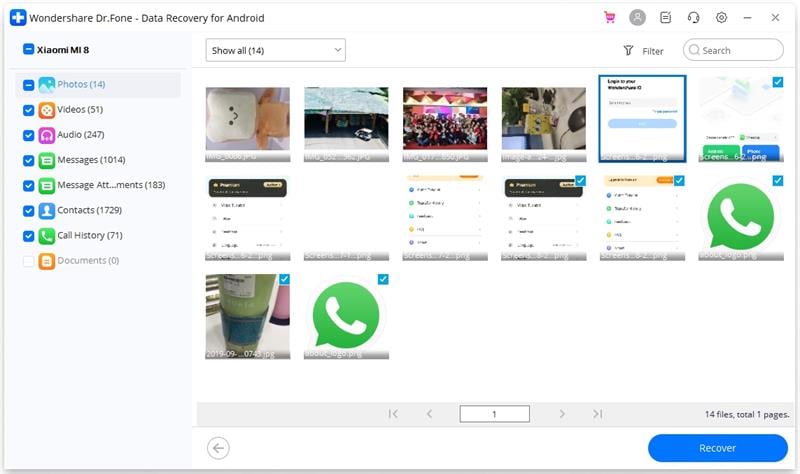
- In one case the process is completed, all the recovered data would exist segregated into dissimilar categories. Yous can just visit whatever category from the left panel and preview your data on the right.
- Select the information files that y'all wish to restore and click on the "Recover" button to get them back. You can make multiple selections or choose an entire folder as well.

That's it! Past following this simple process, you would be able to learn how to recover deleted contacts from Android phone retentivity. Yous can as well recover all the other data types like photos, videos, audios, messages, documents, etc.
Part iii: How to recover deleted files from internal retentivity for free? (Complicated)
While looking for options to perform prototype recovery from phone retention, I found this post from xda developers forum. It explained how to recover deleted files from Android telephone internal memory. The only catch is that your device should be rooted. As well, the process is extremely complicated and chances are that you lot might not get it correct in the first few attempts.
Firstly, nosotros have to make a copy of your phone'southward internal storage every bit a RAW file. This would afterwards be converted into a VHD format. Once the virtual hard disk would be mounted to your Windows disk management, nosotros can browse it using any reliable data recovery tool. Okay – I agree, it does sound complicated. To make it easier for you to perform internal retentiveness recovery using this technique, I have broken down the process into unlike steps.
Step 1: Creating an image of your Android's internal retentivity
one. Firstly, nosotros have to make an image of the phone'south internal memory. To do this, we will take the help of FileZilla. You can just install the FileZilla server on your system and run it. Just make sure you lot are running it as an administrator.
ii. Once FileZilla is launched, go to its full general settings. In the "Mind to these ports" feature, list the value of 40. Also, in the timeout settings hither, provide 0 for the connection timeout.

3. Now, go to the Users settings and cull to add a new user. As you can meet, we have created a new user here with the name "qwer". Y'all tin can specify any other proper name equally well. Also, set a countersign for the user. To brand it easier, we have kept it as "pass".
4. Enable the read and write operations for it and salvage it at C:\cygwin64\000. Here, C: is the drive where Windows is installed.

5. Great! Once it is washed, you need to install the Android SDK on your system. You can download it from Android'due south official website correct here.
half dozen. Later on installing it, copy the adb.exe, adb-windows.exe, AdbWinApi.dll, AdbWinUsbApi.dll, and fastboot.exe files to C:\cygwin64\bin.
7. Connect your Android phone to the system. Just make sure that the USB Debugging option is enabled on information technology beforehand.
eight. Open the Command Prompt and enter the following commands. This will let you obtain a listing of the available drives. In this fashion, yous can only copy a selected bulldoze instead of the unabridged phone storage.
- adb beat out
- su
- find /dev/cake/platform/ -proper name 'mmc*' -exec fdisk -l {} \; > /sdcard/list_of_partitions.txt
ix. Here, the "list_of_partitions" text file will contain information about the partitions on your telephone. Requite the following command to copy information technology to a safety location.
adb pull /sdcard/list_of_partitions.txt C:/cygwin64/000
10. Later, you can open up this file and manually wait for any information regarding your missing data.
11. In society to make an image of your telephone'due south internal information, you need to provide certain commands. Open a new console window and enter the post-obit details.
- adb beat out
- su
- mkfifo /cache/myfifo
- ftpput -v -u qwer -p pass -P 40 192.168.42.79 mmcblk0p27.raw /cache/myfifo
12. Hither, "qwer" and "pass" are our username and passwords that you can replace with yours. This is followed by the port number and the server accost. In the end, we take specified the particular expanse that was associated to the file's original location.
13. Launch another panel and type the following commands:
- adb crush
- su
- dd if=/dev/block/mmcblk0p27 of=/cache/myfifo
14. As stated earlier, "mmcblk0p27" is the location on our phone from where the data was lost. This tin vary from one phone to another.
15. This will make FileZilla copy the data from your telephone to the folder "000" (as provided earlier). You would take to wait for a while for the process to be completed.
Step 2: Converting the RAW to a VHD file
i. Once you have copied the data, yous need to convert the RAW file into a VHD (Virtual Hd) format so that y'all tin can mount information technology in your system. To do this, you tin just download a VHD tool from here.
two. When it is done, you accept to copy the VHDTool.exe file in the working folder. In our case, it is the 000 folder. Launch panel once again, go to the folder, and type the following:
cd C:/cygwin64/000/ VhdTool.exe /catechumen mmcblk0p27.raw
3. While the converted file proper noun volition have the RAW extension, information technology can be used every bit a virtual hard disk.
Step iii: Mounting it equally virtual difficult disk in Windows
1. You are almost at that place! At present, all you need to do is mount the virtual hard disk drive in Windows. To do this, go to the Disk Management settings on Windows.
two. Now, become to the Settings > Activity and click on "Attach VHD".

iii. When it will inquire for a location, provide "C:\cygwin\nexus\mmcblk0p12.raw". Recall, the name of your file would be different here.
4. Right-click it and choose to Initialize Disk > GPT. Also, right-click on the empty space and select the "New Simple Volume" option.

five. Merely complete the sorcerer by assigning a new letter of the alphabet to the bulldoze and disable the partitioning.
6. Also, right-click the RAW part and format it. The file system type should be FAT 32.
Step 4: Perform Information Recovery
In the finish, y'all can utilize any freely available data recovery tool and browse the virtual hard disk drive that you take merely mounted on your arrangement. When the application will ask you the location to perform data recovery, provide the letter of the virtual hard disk that y'all have allocated in the previous step.
Needless to say, this technique has numerous complications. Firstly, yous can only perform phone retentivity recovery on a Windows PC as it won't work on a Mac. About importantly, your device should be rooted beforehand. If not, then you won't exist able to create a RAW file of its internal storage. Due to these complications, the technique seldom yields the desired results.
Part 4: How do I recover data from the internal memory of a not-working Android phone?
Fifty-fifty if your phone is malfunctioning or broken, you can accept the assistance Dr.Fone – Data Recovery (Android) to restore the inaccessible content from information technology. Every bit of now, it supports data recovery from broken Samsung devices. That is, if you lot own a Samsung phone which is physically damaged, you can still try to recover your data by using MedicoFone.
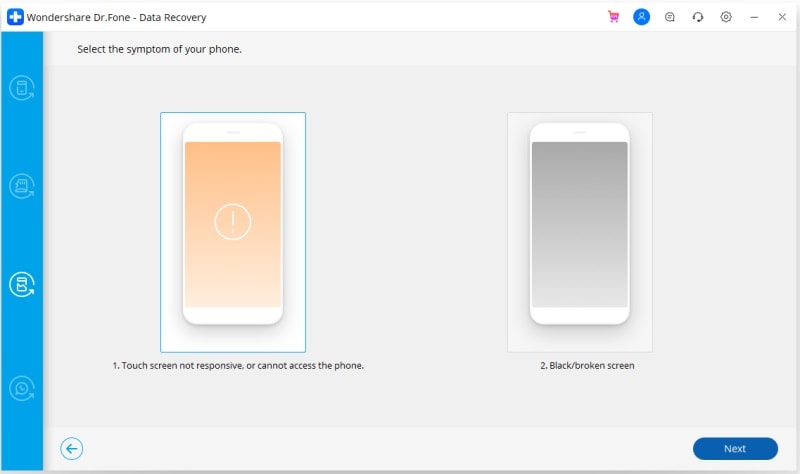
All you need to exercise is connect your telephone to the system, launch Dr.Fone – Information Recovery (Android), and choose to perform data recovery on a damaged device. You would have to let the application know how your phone has been damaged. Every bit of now, the service is only available for the damaged Samsung phones, but the application volition soon expand information technology to other models equally well.
It will perform a comprehensive information recovery on your damaged telephone and will let y'all recover it to a safe location without whatsoever problem.
As you lot tin encounter, there are dissimilar ways to acquire how to recover deleted files from phone memory. If yous don't want to go through any unwanted hassle and go positive results, then simply endeavor DoctorFone – Information Recovery (Android). It comes with a gratis trial version likewise and then that you can first test how the application works. If you similar its results, and then you can just buy the tool and perform data recovery on telephone'due south retentivity similar a pro. Go ahead and download this memory recovery software right abroad. You never know – it might end upwardly saving your data some day.

Source: https://drfone.wondershare.com/android-recovery/phone-memory-data-recovery.html
Posted by: stillmanwasonerecied.blogspot.com
0 Response to "How To Upload Photos From Internal Memory On Phone"
Post a Comment